GDS 73 - Digital Photography Online - Weekly Instructions
Summer 2020- Section 51183
- Check due dates on the calendar and turn in files in Canvas
- The course is here in Canvas:
https://wvm.instructure.com/courses/35218 - See the class links sidebar on this page for Canvas help and online learning related links.
- All Kelby book related files can be downloaded from http://kelbyone.com/books/cc17/
- If you have general questions, ask them in the discussion forum in Canvas. You can find it under the Discussions link on the left or the Content Links module.
- Here is a direct link to The Adobe Photoshop CC Book for Digital Photographers (2017 release) book on Safari Books
- Here is a direct link to The Adobe Photoshop Lightroom Classic CC Book for Digital Photographers book on oreilly.com
- Here are the instructions for obtaining a free Safari Books online account.
- Here is a link to the help files for many versions of Photoshop.
- Here is a page from Adobe with many video tutorials on Photoshop.
- Here is a page from Adobe with many video tutorials on Lightroom Classic.
- Here is a page from Adobe with many video tutorials on Lightroom CC.
- Adobe Bridge User Guide
June 8 - Week 1 Instructions:
- Welcome to the class!
- Note:
Since this is a Summer session, it is somewhat accelerated. Basically you are doing a 16 week class in 6 weeks, so it's about 3 times faster. If this were an in-person class, it would be meeting about 16 hours per week. So, if you have not done this already, try to figure out a regular(maybe daily)time when you can work on the class. It can help in online classes. Procrastinating is not advised ;)
There are some other good tips for online learning here at
8 STRATEGIES FOR GETTING THE MOST OUT OF AN ONLINE CLASS - Login to Canvas (https://wvm.instructure.com) and download the syllabus in Canvas from the class home page near the top if you don't have it.
- See the class links sidebar on this page for Canvas and online learning related links.
- Watch the Orientation for the class. Make sure to refer to the current version of the syllabus when viewing the orientation. The syllabus can be found in Canvas from the class home page near the top. The link to all video lectures is near the top of this page. The books or other details may have changed from the video. The current syllabus has the most up to date information.
- Read the General Class Information in Canvas (https://wvm.instructure.com). It may be slightly different than the video or syllabus.
- Please let me know if you are confused or having trouble with the material. Post most or all of your questions in the question discussion forum in Canvas under the discussions link. If your question is more personal, you can message me through Canvas (https://wvm.instructure.com), by logging in, clicking on the class, clicking on the inbox link on the left, and creating a message. It's like email inside the class.
- Assignment:
Post in the "Introductions" discussion forum in Canvas. Give a short introduction to yourself, and about your expectations for the class. You can find the discussion forum under the Discussions link on the left or the Content Links module. I will check this to verify you are in the class. Make sure to reply to the post as soon as possible to avoid being dropped. - Mission College tutoring is now online, and there is tutoring for some of our classes if you need it.
- We do use photoshop and Lightroom in the class.
Many things can be done in both Lightroom and Photoshop, and photographers use both. Lightroom is better for organizing and processing lots of images, while Photoshop can do some image manipulation that Lightroom cannot, such as compositing images(assembling multiple images into one). So, we will talk about and use both, sometimes for similar functions. You can decide later which program you want to use for certain functions, situations or workflows.
For this class you can use either the full Creative Cloud plan or the Creative Cloud Photography plan.- Adobe Creative Cloud may be available for free access for all or part of the term. Use your student email address, and sign in to https://creativecloud.adobe.com/apps (Links to an external site.), then click either Download or Install apps.
- You can also find current the Adobe Creative Cloud for Semester License at http://store.collegebuys.org/. This might be the best deal right now at $39.99 for 6 months.
- Adobe software like Photoshop and Lightroom are usually available in the Academic Support Center on Campus(not currently available due to Covid-19). Check their web site for current hours. http://missioncollege.edu/depts/academic_support/
- Take the Opening Day Survey in the Week 1 module in Canvas.
- Watch the video on Camera Features.
- Note: The main criteria for a camera to use in this class is one with manual exposure controls like Aperture Priority, Shutter Priority, etc. You could get by without these controls, but you will be limited. See below for more details and recommendations.
- Here is a page on with camera buying guides by budget, camera type, etc.
- There is a guide here with cameras that have manual controls that would work for the class.
- A cell phone is not really good enough.
- Check out this page on Exposure Modes, which are important in the class(your camera needs to have these modes). We will talk a lot more about these modes in the class.
- Check out these sites for more camera suggestions
- Optional: Watch the video Introduction to Flickr.
Note:
The Flickr interface can change at any time, so the site may be slightly different from the video, but I think you can figure it out ;). - Optional:
Join our Flickr group https://www.flickr.com/groups/gds73_online_summer2020/- You can share images from your assignments in the group, and see the images from other students. This is usually optional.
- Sign up for Flickr.
- Go to the link for the group above and click join this group.
- There are quite a few videos this week, but some are optional. We want to get going quickly with the photography :)
- Watch the video about Exposure (the link to a page with all the video lectures is also near the top of this page). This is one of the most important videos!
- Watch the video on Exposure Modes. This may help a lot with Assignment 1, but you can do assignment 1 without watching this video first if you want.
- For Canon Users. Watch the video Camera Controls 1 - Canon SLR on digital SLR cameras. This one goes over a Canon Camera, which a lot of you have, but it also will help with any digital SLR.
- Optional this week for Canon Users: Watch the video on Camera Controls 2 - Menus and Quick Control(Canon) , if that is what type of camera you have. I would highly recommend this video if you have a Canon camera, and it can also help with most other digital Cameras, because a lot of the concepts are the same.
- For Nikon users. Watch the video on Camera Controls 3 - Nikon SLR, if that is what type of camera you have. It is not as in depth as the first 2 camera control videos, but covers some Nikon specific things.
- Optional: Watch the video on Camera Controls 4 - Point and Shoot, if that is what type of camera you have. I think most of you have a larger camera, but some may have a smaller, compact camera.
- For the next 2 videos, you can follow along with your own files if you want. You will use the techniques to turn in your first assignment.
- Watch the video Importing and Exporting files with Lightroom.
- Watch the video Web Gallery Export with Lightroom.
Important Note:
You may be wondering why we are talking about importing with both Photoshop/Bridge and Lightroom?
Photoshop/Bridge and Lightroom are required for the course. Photoshop, Bridge and Lightroom come with either the full Creative Cloud Complete plan or the Creative Cloud Photography plan. Many things can be done in both Lightroom and Photoshop, and photographers use both. Lightroom is better for organizing and processing lots of images, while Photoshop can do some image manipulation that Lightroom cannot, such as compositing images(assembling multiple images into one). So, we will talk about and use both, sometimes for similar functions. You can decide later which program you want to use for certain functions, situations or workflows.
- Optional: Here is more information on importing into Lightroom Classic from Adobe if you want to check it out.
- Optional: Here is a video from Adobe with more information on exporting and printing from Lightroom Classic.
- Check out Chapter One. Shooting Natural Light Portraits Like a Pro from The Digital Photography Book, Part 5:Photo Recipes for tips that will help with Assignment 1.
- You should be able to get free access to this material by signing up using the instructions here:
Here are the instructions for obtaining a free Oreilly Safari Books online account. - Go outside and shoot portraits of one person
- Note: Since you may be in a restricted environment due to Covid-19, you should choose someone from your household to shoot pictures of for this Assignment. Please DO NOT need to take any risks or break any rules to do this assignment. Be safe. You can shoot these at your home with someone in your household. Please let me know if you do not have anyone else at your location that you can photograph.
- We are just getting started, so don't worry if you think your images aren't what you would like.
- Make sure to shoot original images for each assignment. Do NOT use older images that you shot before the class.
- Try out manual controls if you have them, and if you know how to use them. Don't worry if you don't. We will go over them later.
- Try some images posed and some candid
- Try some images with the subject looking into the camera, and some not
- Try some close-ups and some wider, full length shots
- Try some with flash and without flash
- See example 1 here
- See example 2 here
- Shoot at least 30 images
- The examples have 30 images or so. You will only turn in 10.
- Download with Lightroom(watch the video tutorials above)
- Pick your 10 best images. Turn in your 10 best images only.
- Make sure you have watched Importing with Adobe Bridge and Web Gallery Export with Lightroom, and turn in EITHER a web gallery, or 10 separate images.
- You have 2 ways you can turn in the images
- DO NOT turn in your 10 original image files. They will probably be really big.
- Make sure you have watched Importing and Exporting files with Lightroom and Web Gallery Export with Lightroom.
- Option 1: Create a web gallery using Adobe Lightroom Classic. Use the procedures in the video Web Gallery Export with Lightroom to format a web gallery of your 10 images. If you do the web gallery option, please use one of the templates under the section "Classic Gallery Templates" for your gallery. In the setting panel on the right, set the image size under "Image Pages" to 1000px. When you submit, make sure to include all the whole folder that Lightroom makes, which has all the files inside, not just one file. If you don't include all the files, the website that Lightroom makes will not work on my end.
- Option 2: Export 10 separate jpeg images in Lightroom Classic to turn in. Use the procedures in the video Importing and Exporting files with Lightroom to format your 10 images. Export as jpeg images with a maximum dimension of 1200 pixels wide or 1200 pixels high in Lightroom. Make sure your name is on your folder before compressing the folder to submit in Canvas (See below).
- After creating your files:
To turn in assignments with multiple files or folders, it works best if you put all files in a folder and zip the folder. It is important to name your folder correctly BEFORE you zip it to send, so I know who's folder it is. Please name you folder like this firstname_lastname_assignX where X is the assignment number. To zip a folder on a PC, create the folder with your name on it and put the files needed in it, then right click, select "send to," and finally "compresses (zipped) folder." On a mac, control click or right click on the folder and select compress. Name the folder before compressing it, so I can see whose it is when it is uncompressed. - Drop your zipped file in the Assignment 1 drop box in Canvas. Check the calendar for due dates.
- Optional: If you have a Canon Camera, here is another video on The Q Button – What Every Canon DSLR Photographer Needs to Know
- Make sure to watch the video on Exposure Modes if you didn't watch it yet(or watch it again since it is so great ;)
- Watch this video on using the histogram on your camera(Youtube video, not by Mark)
- Watch the video on Exposure Compensation
- This one can help with the Locations Explorations assignment below
- Watch the video Importing with Adobe Bridge. Bridge is used with Photoshop to view and process multiple files.
- Optional: Here is a page from Adobe, Import photos using Photo Downloader in Bridge with another description of the process.
- Here is a link to the Adobe Bridge User Guide for your reference
- Watch the video on Image Processing and Renaming Files with Bridge and Photoshop
- NOTE: The Image Processor in the video can now be found in Photoshop by going to the File Menu, and then scripts. It is no longer available in Bridge as of Spr 18.
The export dialog in Lightroom is under the file menu.
- NOTE: The Image Processor in the video can now be found in Photoshop by going to the File Menu, and then scripts. It is no longer available in Bridge as of Spr 18.
- Watch the video on The Benefits and Use of Tripods
- Watch the Joel Meyerowitz video on street photography
- The video quality is not great, but it's a nice intro to street photography
-
Assignment 2 - Location Explorations - Main Assignment:
Put yourself in 2 locations, and make photographs only of subjects you can see from where you are standing, without walking around. Again, since you may be in a restricted environment due to Covid-19, you can choose both locations from where you are, such as at home or wherever you are. Please DO NOT need to take any risks or break any rules to find both locations. Home is fine if that works.
You can move up or down(squat). Really look around! Change your perspective. You can turn around, get low, point up or down, etc. You can also use a tripod if you want or need to. You can also use the zoom on your lens if you want to. Pay close attention to framing, composition and exposure. Don't include people in this one. Try to create images that you like, as well as images that you think others might like. Make sure you get 10 quality images.Document 1 indoor scene and 1 outdoor scene with 5 quality images each. So, you should be showing 2 different locations, 5 shots each. Get as many as you can from each spot, thinking of all possible images, and then pick your best 10.
Also, always make sure to shoot new, original images for each assignment. Please do not turn in old images that may fit the assignment.
Take a look at some examples. Download examples here. These are from a slightly different version of this assignment, where the photographers moved between shots. You will not be moving this time(except for up and down.
Tip: You may want to use a tripod indoors if the light is low, so you will not get blurring from camera shake. Watch the video on The Benefits and Use of Tripods(Youtube video) for more information on tripods.
- Think about the camera settings for each shot(if your camera has manual controls).
- f-stop(aperture)
- shutter speed
- ISO
- shooting mode(manual, aperture priority, etc.)
- general focal length(wide angle, normal or telephoto)
- These terms are in your reading and on the terms page.
- Experiment with the controls you do have on your camera.
- Experiment with different angles, focal lengths, f-stops(If possible) and shutter speeds(If possible).
- Make sure to shoot at least 1 image using each of the following settings(if your camera allows it).
Check out pages 38 and 147-157 of the Betterphoto Basics book(if you are using the kindle version, look for aperture priority in Step 1 and Step 5), and the terms page for a description of some of these exposure modes.- aperture priority
- shutter priority
- manual exposure
- manual focus
- To Turn in:
- Do not do a web gallery for this assignment. You will just turn in separate files. (See details below)
- Resize your images to a maximum dimension of 1000 pixels wide or 1000 pixels high(watch the video Image Processing and Renaming Files with Bridge and Photoshop) and save them as jpegs with a quality setting of 7.
- If you don't resize to this size, Canvas might not upload the file.
- NOTE: The Image Processor can now be found in Photoshop by going to the File Menu, and then scripts. It is no longer available in Bridge as of Spr 18.
The export dialog in Lightroom is under the file menu. - You could also import into Lightroom instead of Bridge, and export from Lightroom, following the procedures in the video Importing and Exporting files with Lightroom. Use the same 1000x1000 pixel size from above in the export window, but use quality 70 instead of 7(The Lightroom quality slider goes to 100!)
- Make sure your images are named like this:
firstname_lastname_assign2_datecreated_imagenumber.jpg- Watch the video on image processing to rename files quickly
- Use your own name and date of course.
- Make sure your name is on each image.
- Put your 10 images only in a folder named firstname_lastname_assign2(use your name), zip the folder and drop them into the Canvas drop box for the assignment.
- To turn in assignments with multiple files or folders, it works best if you put all files in a folder and zip the folder. It is important to name your folder correctly BEFORE you zip it to send, so I know who's folder it is. Please name you folder like this firstname_lastname_assignX where X is the assignment number. Then when you zip the folder, I will know it is yours. To zip the folder: To zip a folder on a PC, create the folder with your name on it like this firstname_lastname_assignX and put the files needed in it, then right click, select "send to," and finally "compresses (zipped) folder". On a mac, control click or right click on the folder and select compress. Remember to name the folder before compressing it, so I can see who's it is when it is uncompressed.
- Optional: Post your favorite indoor shot and your favorite outdoor shot to your flickr account and add them to the group page:
- https://www.flickr.com/groups/gds73_online_summer2020/
- Check out other students' images after the due date on flickr.
- Post comments on other students' images in Flickr
- Think about the camera settings for each shot(if your camera has manual controls).
June 15 - Week 2 - Instructions:
- There is now tutoring available if you need it for the class, through the Academic Supprt Center. See the announcement in Canvas for more information.
- Reading for this week.
Go over Chapter One. The Image Frame from The Photographers Eye - This will help with framing your subject for Assignment 5(and others)
- You should be able to get free access to this material by signing up using the instructions here:
Here are the instructions for obtaining a free Oreilly Safari Books online account. - Review the terms page
- Read the files on thinking about photos and the file on critique procedure.
- Assignment: Take a look at the images submitted for Assignment 1, and then comment on 1 image from someone else in the discussion forum called Assignment 1 Discussion. Tell us one image from the assignment that you liked and why. We are looking for factors that can make a portrait more interesting or aesthetically pleasing in some way. It could be lighting, expression, etc. Basically, what can make a portrait "good", whatever that means to you?
I will post a link to the images on Tuesday. Read the files on thinking about photos and the file on critique procedure for ideas on what to talk about. Here is the link to the Assignment 1 images. - Watch the video What Makes a Good Photo
- Watch the video on Introduction to Adobe Bridge
-
Assignment: Complete the Camera Survey Assignment in Canvas
- Make sure to answer all the questions, using your camera manual when you need to. If you don't have your manual, you can usually download it.
- Assignment 3: Collect 5 photos from a photographer of your choice. They can be the work of any kind of photographer(commercial, artist, photojournalist, etc). The work can be straight or manipulated.
This one is due a little sooner, so we can talk about it. Check the calendar in Canvas for due dates.
To Turn in:- Resize your images to a maximum dimension of 1200 pixels wide or 1200 pixels high(watch the video Image Processing and Renaming Files with Bridge and Photoshop) and save them as jpegs with a quality setting of 7 or higher, or see other methods below.
- If you don't resize to this size, Canvas might not upload the file.
- NOTE: The Image Processor can now be found in Photoshop by going to the File Menu, and then scripts. It is no longer available in Bridge as of Spr 18.
The export dialog in Lightroom is under the file menu. - You can also now export directly from Bridge using the export panel as of Bridge 2020. See the quick tip on exporting to jpegs from Bridge here.
- You could also import into Lightroom instead of Bridge, and export from Lightroom, following the procedures in the video Importing and Exporting files with Lightroom. Use the same 1200x1200 pixel size from above in the export window, but use quality 70 instead of 7(The Lightroom quality slider goes to 100!)
- Make sure your images are named like this:
photographersfirstname_photographerslastname
_assign3_imagenumber.jpg- Watch the video on Image Processing and Renaming Files with Bridge and Photoshop and/or Importing and Exporting files with Lightroom to rename files quickly. You could also export from Bridge 2020.
- Upload your 5 images only to the assignment in Canvas. Do not zip the files this this time, so other students can see later. Upload the images as 5 separate files with your submission.
- Resize your images to a maximum dimension of 1200 pixels wide or 1200 pixels high(watch the video Image Processing and Renaming Files with Bridge and Photoshop) and save them as jpegs with a quality setting of 7 or higher, or see other methods below.
- Assignment: Peer Review of Assignment 3
Review some images submitted by other students for Assignment 3. Here is the link to the assignment 3 images to use for the discussion.There are instructions there for downloading all the images. Take a look at all the images. In the Discussion forum called "Assignment 3 Discussion", talk about why you like or don't like one or more images from a certain photographer, or why you think the images are interesting or significant. DO NOT comment in the dropbox.com folder, comment in the discussion forum in Canvas. Do this first post by Sunday. Also reply to a post by another student by Monday. - Adobe Lightroom was split into 2 version around October 2017.
Watch this video on Lightroom CC or Lightroom Classic CC - Which Workflow is Best for You?
(We will be using the Lightroom Classic Version) - Watch the video Introduction to Lightroom Classic)
Important Notes:
Adobe Lightroom was split into 2 version around October 2017.
Basically the Classic version is more like the previous desktop version. There is also Lightroom CC, which is targeted more for mobile devices. Confusing? Yes. Many people are upset they must now pay a subscription to keep access to Lightroom. They do not want to trust a lifetime of work to software they must rent and cannot "buy" anymore. That being said, we will continue to use Lightroom Classic in the class for at least the immediate future, since it is still kind of a standard. Also, your images are not stuck in Lightroom Classic if you quit the subscription. Since Lightroom edits are non-destructive, your original images are still just fine on your hard drive, but your "edits" are in Lightroom. I will be on the lookout for other possible replacements, however. If you have any suggestions, such as Luminar, let me know. Feel free to use either version of Lightroom in the class if you want, and it makes sense for what you are doing, but the videos are using the desktop version unless noted. - Here is a page from Adobe with many video tutorials on Lightroom Classic. This is the version we will be using.
- Check out this video from Adobe with more on organizing your images in Lightroom CC (Duration 7:26). You can use either Bridge or Lightroom Classic to organize your images for the class. If you are using Lightroom Classic to organize your images, you could use some of the techniques to organize your assignment images.
- Here is a book on Lightroom called The Adobe Photoshop Lightroom Classic CC Book for Digital Photographers. You should have access to through your oreilly.com account.
- Here is a page from Adobe with many tutorials on Lightroom CC. We won't be using Lightroom CC too much. It is a more consumer oriented, cloud based app whcih might be better for mobile photography, like with your phone. We won't be using Lightroom CC in the class, but you can use it on your own. It's a free country...
- Important! Watch the video about Depth of Field
- Important! Watch the video about Focal Length
- Important! Watch the Shutter Speed/Depth of Field Assignment Intro video
-
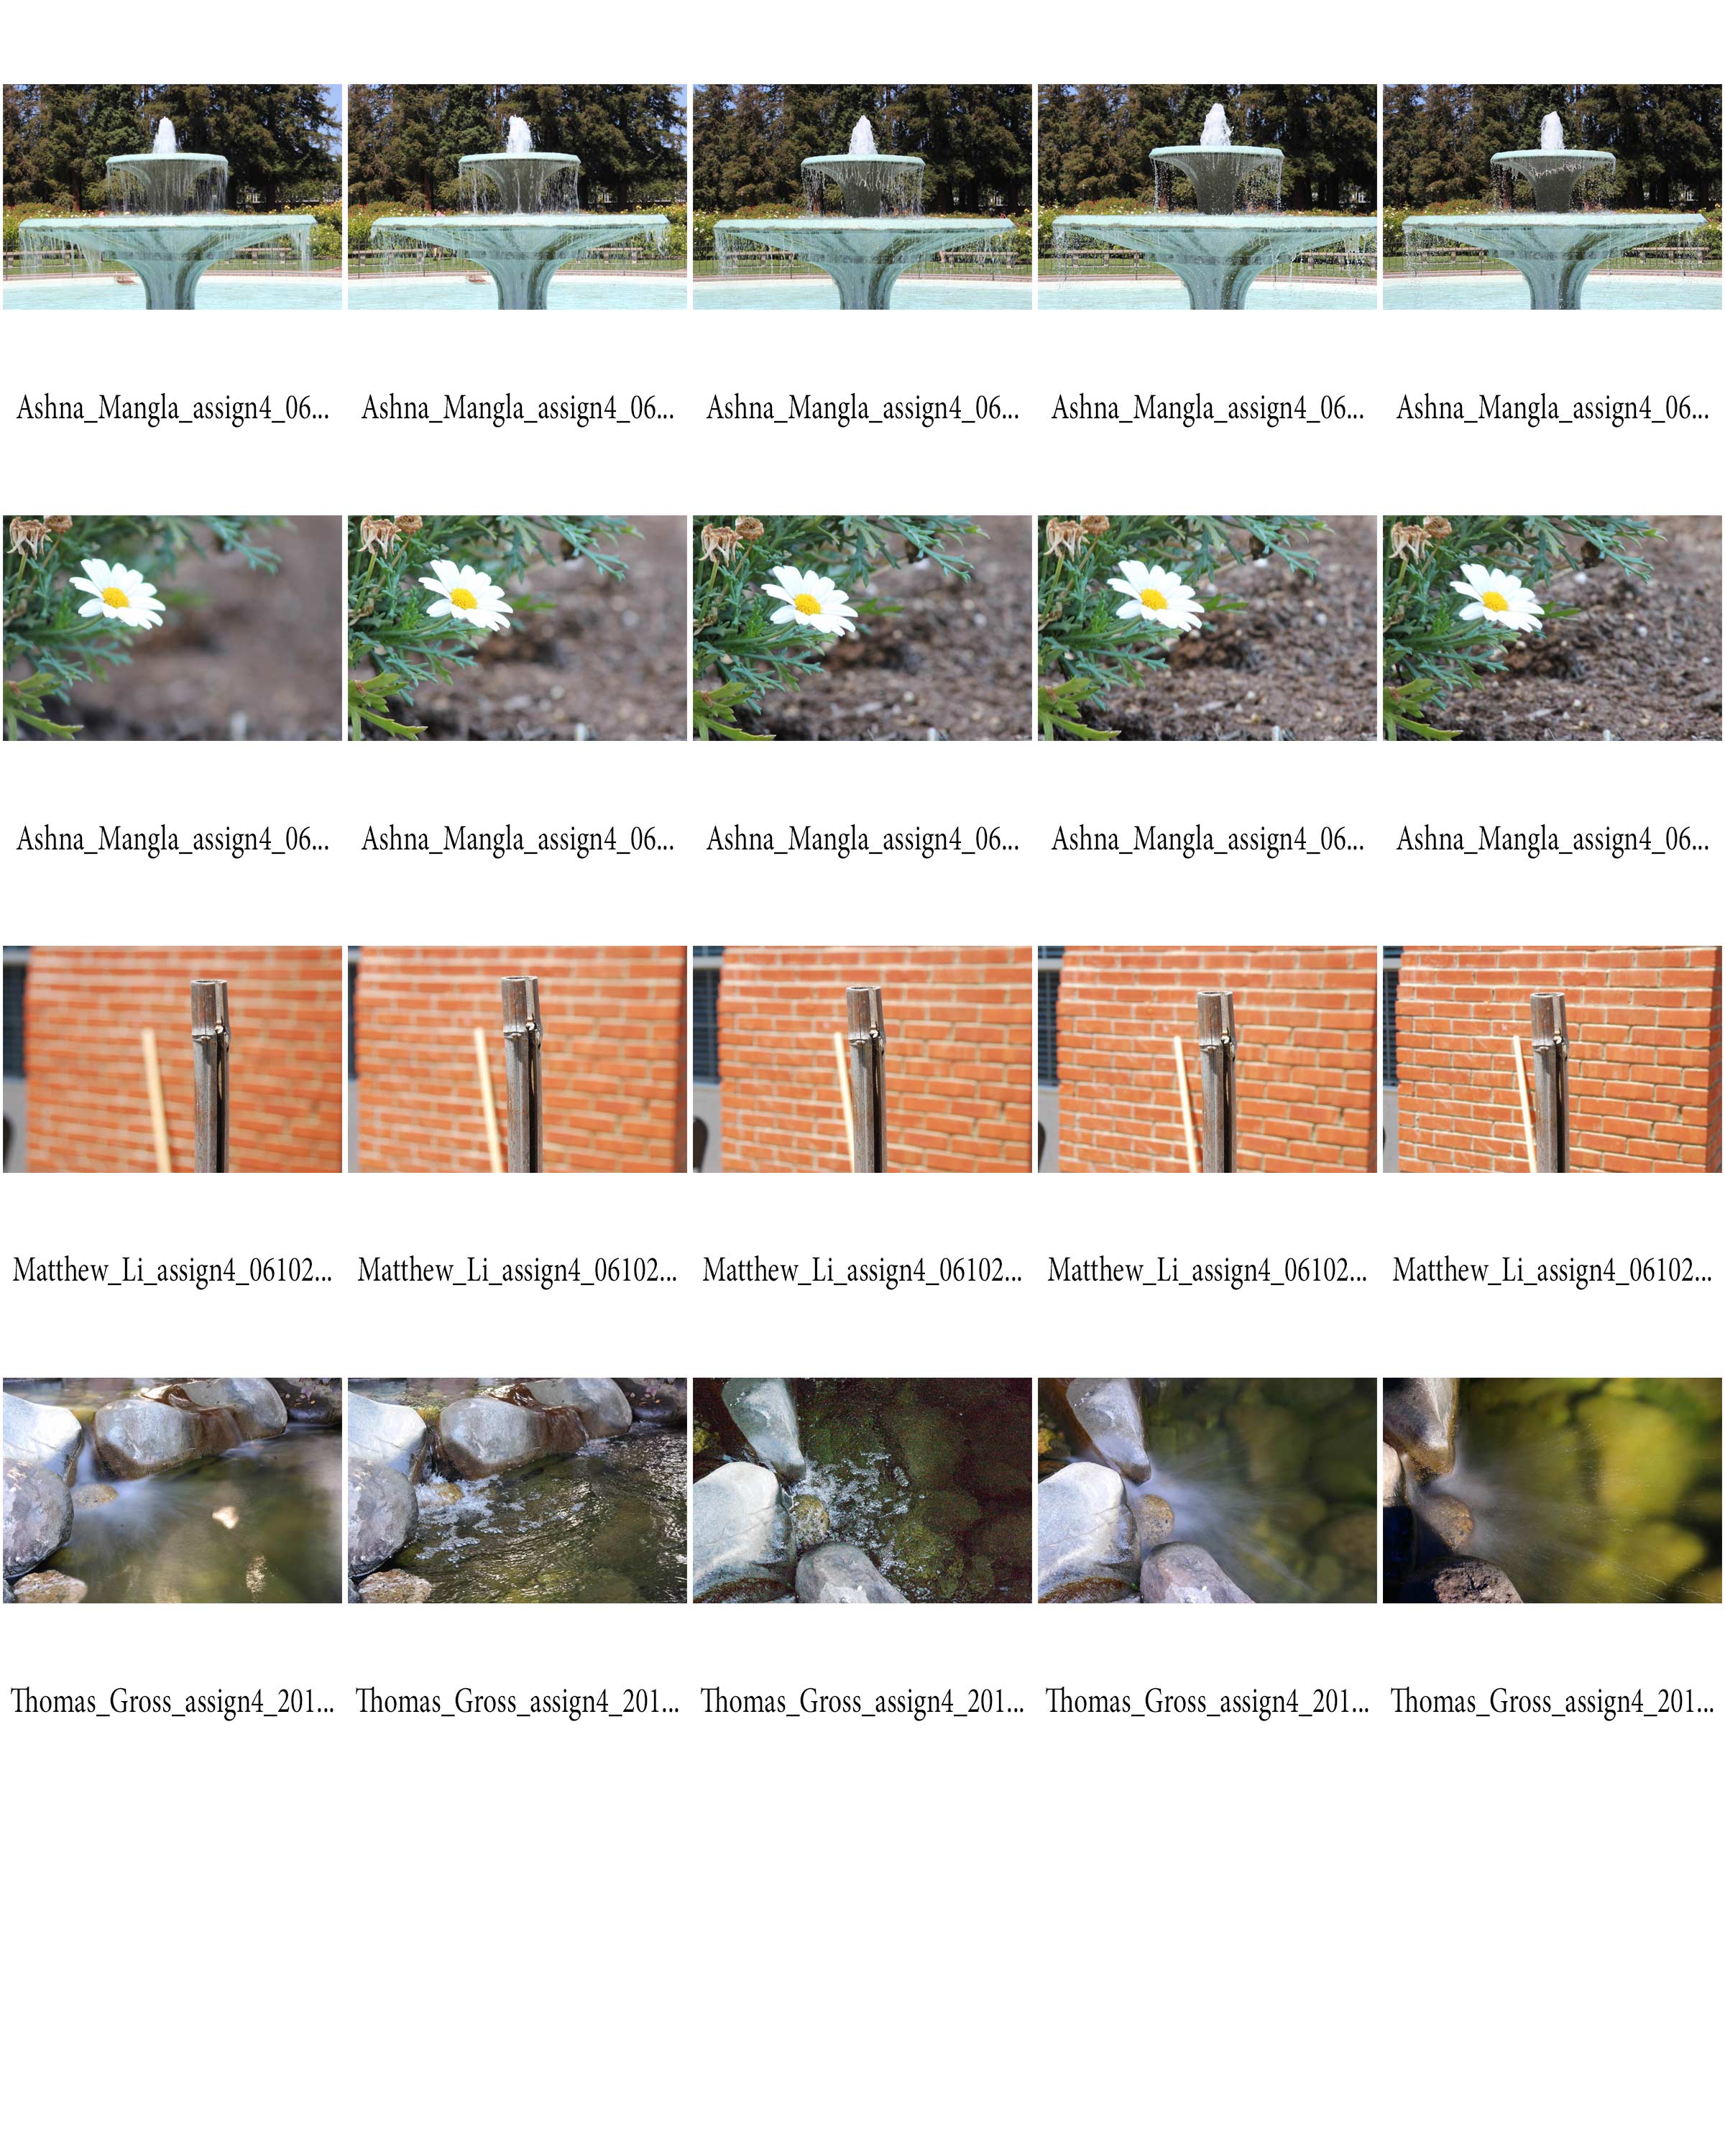
Assignment 4 - Main Assignment - Shutter speed and depth of field:
Shoot photos of 2 different scenes exploring the effect of shutter speed and changes in depth of field.- Make sure to watch the intro video Shutter Speed/Depth of Field Assignment Intro
- Also, make sure to shoot original images for each assignment. Do NOT use older images that you shot before the class.
- Look at examples here.
- Scene 1:
Shoot images with different shutter speeds. You should have images with a slow shutter speed, like 1/15 second, and a fast shutter speed, like 1/500 second.- These 5 images can be of the same scene, or even the same exact composition, just with different shutter speed settings.
- Set your camera to Shutter Priority mode if it has that setting.
- The aperture will change to compensate for faster or slower shutter speeds.
- This part of the exercise will work best on subjects that are moving.
- Scene 2:
Shoot images with different apertures. You should have some images where you used a small aperture, and some with a large aperture.- These 5 images can be of the same scene or composition, with different depths of field evident in the shots.
- Set your camera to Aperture Priority if it has that setting.
- The shutter speed will change to compensate for smaller or larger apertures.
- This part of the exercise will work best on scenes with objects in the foreground and background.
- If you do not have direct control of shutter speed and aperture, like on a point and shoot, try to use the controls you do have, like scenes, or factors like the distance to your subject to change the depth of field. Some scenes, like sports for example, might use a faster shutter speed. You will need to experiment. Use your manual to figure out the effect of different scene settings.
Turn in exactly 5 images that show different shutter speeds and exactly 5 images that show different depth of field.
Please shoot new images for all assignments. Do not turn in old images you have taken previously.- To Turn in:
- Resize your images to a maximum dimension of 1000 pixels wide or 1000 pixels high(watch the video on image processing) and save them as jpegs with a quality setting of 7. You can also export at that size from Lightroom with a quality of 70, or You can now export directly from Bridge using the export panel as of Bridge 2020. See the quick tip on exporting to jpegs from Bridge here.
- Make sure your images are named like this:
firstname_lastname_assign4_datecreated_imagenumber.jpg - Watch the video on image processing or use bridge to rename files quickly
- Use your own name and date of course.
- Put your 10 images only in a folder named firstname_lastname_assign4(use your name), zip the folder and drop them into the Canvas drop box for the assignment. It is important to name your folder correctly BEFORE you zip it to send, so I know who's folder it is.
- Check the calendar for Due dates.
- Watch the video on White Balance
- Here are more camera specific white balance instructions
- How To Nail Accurate Color On A Canon Camera
- Canon 5D tutorial: Manual white balance
- How to Custom White Balance a Nikon Digital SLR
- Nikon Unveiled: Setting a Custom White Balance
- How To Set A Custom White Balance On Sony Alpha Cameras (And Why)
- Setting A Custom White Balance On Your Sony Camera
- Your camera manual will give you detailed instructions for your particular camera
- Watch the video on Keywords and Collections in Lightroom
- Optional: Here are some more videos on Keywords and Collections from Adobe
- Through your oreilly.com account, you can got more information on Keywords and Collections in Chapter 2. Getting Organized: my system for a happy Lightroom life from The Adobe Photoshop Lightroom Classic CC Book for Digital Photographers
- Watch the video about Scanning
- Watch at least the minutes 2-10 of Masters of photography - Diane Arbus
- (The woman who is onscreen at 2:00 is her daughter)
- Optional: Watch this video on Garry Winogrand
-
Assignment 5 - Main Assignment - Object photos:
Photograph 1 object in many different ways. The same object is your subject and is in every photo. Examples for objects would be a chair or guitar. It can be any object, but not a person or animal. Be as creative as you can. You can move the object, change the lighting, etc. You can try to create some abstract images, where the actual object is not recognizable. Think about all the options you have with 1 main subject only. Please do not shoot images of many different objects. Shoot at least 40 images total. Select your 20 best, then select your 5 best images. They can be manipulated or straight. See Examples Here.
For help, consider the following list of characteristics of images:- Framing (See over Chapter One. The Image Frame from The Photographers Eye )
- Composition
- Focus/depth of field
- Light
- Contrast
- Color
- Point of emphasis
- Line
- Shape
- Texture
- Balance
- Point of view
- Motion
- Perspective
To turn in
- Resize your 20 best images to a maximum dimension of 1000 pixels wide or 1000 pixels high(watch the video on image processing) and save them as jpegs with a quality setting of 7. You can also export at that size from Lightroom with a quality of 70.
- Using the same techniques as used previously, make sure your images are named like this:
firstname_lastname_assign5_datecreated_imagenumber.jpg - Turn in as a folder of 20 files, with your 5 selects(best of the best) in an inside folder.
- Zip the folder and put the file in the drop box in Canvas.
- If you have an Instagram account, try to post post 1 of your images there, and tag it with #photographyatmission. To do this, you can email the image you have chosen to yourself, and post from your phone. There are other methods, but this may be the simplest.
- Optional: Post your 5 selects to your flickr account and add them to the group page:
- https://www.flickr.com/groups/gds73_online_summer2020/
- Optional: Post your opinions on at least 2 images of your classmates on Flickr.
June 22 - Week 3 - Instructions:
- Reading this week. Read Chapter 1, The Five Characteristics of Light, from Lighting for Digital Photography:From Snapshots to Great Shots.
- This will help with framing your subject for Assignment 5(and others)
- You should be able to get free access to this material by signing up using the instructions here:
Here are the instructions for obtaining a free Oreilly Safari Books online account.
- Watch this video on Henri Cartier-Bresson
- Discussion:
Write a post by Thursday about something interesting from the video on Henri Cartier Bresson, and/or the reading on the Five Characteristics of Light. It could be an idea Bresson mentions about his method, or an image that moved you in some way. The discussion forum is called "Bresson and Light Discussion". Also, respond to at least one other person's post by Monday. - Watch the video on Visual Weight/Point of Emphasis
- Important Note: There were some significant interface changes made this month(June 2020) to Adobe Camera Raw, so depending on what version you have, the interface may look different from the video and some of the exercises. Most of the functionality is the same however.
- Watch the video on Introduction to Camera Raw
- Again, the interface of Adobe Camera Raw has recently changed, but the functionality is mostly the same.
- There is a newish slider in the basic adjustments area in Camera Raw called Texture, which is used to enhance or decrease texture(duh). Here is an article that explores the diferences between the controls for Texture, Clarity and Sharpening, whcih do similar but not identical things.
- Here are some more videos from Adobe on using Adobe Camera Raw, if you are interested.
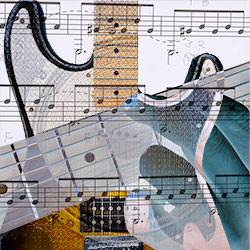
- Assignment 6: Go through Chapter 1 of the Adobe Photoshop CC Book for Digital Photographers - 2017 Version - by Scott Kelby (The Kelby Book from now on).
Follow the procedures under the section Putting It All Together on pages 26-27 of the printed book(about 2/3 of the way through Ch. 1). The chapter has instructions on how to open a jpeg in Camera Raw(the image is a jpeg). Save the edited file as a jpeg and drop it into the Assignment 6 folder. The original starting file can be found here: http://kelbyone.com/books/cc17/ under Chapter 1 – Raw and Un-Kutt
If you are using a digital version of the book, the page number might be different. Look for the exercise with this image(minus the text and blur).
- Watch the video Garry Winogrand and his Crooked Horizon Lines [Street Photography Tips]
- Here is an older video on Garry Winogrand if you are interested, and a trailer for a newish documentary
- Assignment: Go through Chapter 2 of the Adobe Photoshop CC Book for Digital Photographers by Scott Kelby. I will not collect these finished files, but you do need to know the material. You can download all files for the Kelby Book here.
- Assignment 7: Watch the video Processing a Scanned Image in Photoshop or Lightroom. Recreate the 1st version of the final image in the video by following the same procedure in Photoshop.
Recreate the image with the cat(you'll know what I mean when you see it ;) using Photoshop, not the second demonstration in Lightroom. The original starting file is here. After you are done, save the file as a jpeg and drop it into the assignment drop box in Canvas.
Note on the video: If you have a newer version of photoshop, you can use Smart Sharpen or the Unsharp Mask filter as used in the video to sharpen your image. More videos on sharpening in Adobe CC can be seen here. - Assignment: Take the Midpoint Survey in the weekly folder
- Optional: Watch this video on online photo editing with pixlr.com
- This content was intended to help with the old version of Assigment 8, which was portraits, but we are scrapping that assignment for now because of our current situation. I have a newer assignment 8 below. You should still check out this material though as it can help with your portraits in the future, and the material may appear on a quiz or test. :)
- Watch the video The Effect of Focal Length on Portraits.
- Watch the video Bounce for Portrait Lighting on using reflectors.
- For more tips, watch these additional videos on shooting portraits with bounce.
- Watch this video on shooting portraits with on camera flash.
- Make sure you have read tips for photographing people with natural light located here. and More Tips for Portraits located here.
- Check out the file The_dPS_Ultimate_Guide_to_People_and_Portrait_Photography.pdf in the Canvas weekly module for more tips on portraits to use on the Portrait Assignment.
- Go through Chapter 3 of the Adobe Photoshop CC Book for Digital Photographers by Scott Kelby. I will not collect these finished files, but you should know the material. You can download all files for the Kelby Book here.
- Watch the video The silent drama of photography | Sebastião Salgado He is one the worlds most respected documentary photographers. It can inspire you for Assignment 8 below.
- Optional: As you work on Assignment 8, you can post some pictures in the discussion forum "Weekly Image Share" so we can all see what everyone is doing.
- Assignment: Take Midterm Quiz in Canvas which covers the reading and videos.
The Quiz is open book and open note, but do not collaborate with anyone on the quiz. There is no time limit. -
Assignment 8 - Main Assignment
Life in a Pandemic- Try to present images to us that show what your life is like at this point and how it feels.
- Shoot in Raw format if you can, and process the images in Adobe Camera Raw, making any adjustments you wish using the techniques in Chapters 1 and 2 of the Photoshop Book
- You can use images from a cellphone for this assignment as well. Feel free to edit the images in Camera Raw or Lightroom.
To Turn in(Please read carefully):
- Pick Your 5-10 best images and process them in Camera Raw and resize your images to a maximum dimension of 1000 pixels wide or 1000 pixels high(watch the videos on image processing and importing/exporting in Lightroom.)
- Here is a video on exporting from lightroom if you are using that to process images. Importing and Exporting files with Lightroom - Duration 14:49
- Here is a video on exporting from bridge 2020.Exporting from Bridge Using the Export Panel - Quick Tip - Duration 5:49
- Here is the video Renaming Files in Bridge and Submitting Assignments in Canvas
- Save them as jpegs with a quality setting of 7 for the image processor in Photoshop, or 70 in Lightoom.
- Please DO NOT turn in your Raw files. They are too big and may cause problems for Canvas.
- Make sure your images are named like this:
firstname_lastname_imagenumber.jpg - Make sure your name is on each image.
- Put only your 5-10 best images in a folder, zip the folder and drop them into Assignment 8 in the weekly module.
June 29 - Week 4 - Instructions:
- Reading this week. Read Chapter 7, Shooting Landscapes and Nature Like a Pro from The Digital Photography Book, Part 5:Photo Recipes.
- This can help with subjects like animals and flowers, as well as Assignment 11 below.
- You should be able to get free access to this material by signing up using the instructions here:
Here are the instructions for obtaining a free Oreilly Safari Books online account.
- Write a post about something interesting you learned from Chapter 7, Shooting Landscapes and Nature Like a Pro from The Digital Photography Book, Part 5:Photo Recipes book, and post it in the discussion forum called "Post on Landscape and Travel Photography here" in the weekly module in Canvas. Also, comment on at least one other person's post. Please post your initial post by Friday and your reply by Monday.
- Mission College tutoring is now online, and there is tutoring for our department if you need it.
- Check out these videos, galleries and articles by Street Photographers Jack Simon and Boogie
- Work through the exercises in Chapters 7 in the Kelby Book. I will not collect the finished files, but it will help with later assignments.
- Make sure you watched this video on using flash to fill shadows(fill flash)
- Watch the video on Basics of Photoshop.
I know some of you are new to Photoshop, and some know it pretty well, so this one is for those who need it. Follow along with the video using the file located here. You don't have to turn anything in for this one. - Watch the video on Selecting in Photoshop.
Follow along with the video using the files located here. You do not have to turn this in. - Read the web page on History of compositing
- Assignment 9: Watch the video on creating Frankenfaces here. Create your own Frankenface by photographing 2 people you live with(or yorself)and combining using the techniques in the video. Make sure you photograph the 2 people in exactly the same way, so they will combine easily, similar to the images in the demo video. If necessary, you can be one of the people used in the image. If you don't have access to one more person besides yourself, you can use yourself and an image of a person you shot earlier(before shelter in place). DO NOT INTERACT WITH ANYONE YOU ARE NOT ALREADY AROUND TO DO THIS ASSIGNMENT! I went through the process again during the in class meeting. You can see that video here.
- To turn in:
- After you are done combining the faces, save your file as a PSD file.
- Then, reduce the image size to 1200 pixels on its longest side. You can do this by going to the image menu in photoshop and choosing image size, and then changing the pixel dimensions at the top. Make sure resample image and constrain proportions are checked at the bottom of the dialog box.
- Save this as a new PSD file with layers(so you don't lose your original).
- Drop the smaller psd file into the assignment drop box in Canvas.
- Use Save As to save a jpeg version of your file
- Post your jpeg image to your flickr account and add it to the group page:
- https://www.flickr.com/groups/gds73_online_summer2020/
- Tag the image with "frankenface"
- Post comments on at least 2 other students' Frankenface submissions in Flickr
- Have Fun!
- Watch the video Refining Selections and Masks for Compositing(with the bear).
Recreate the image in the video by following the same procedure.
The starting files from the video of the bear and dune are located here.
Save the file as a PSD file with layers. - Watch the video on Compositing with Shadows in Photoshop(with the priest).
Recreate the image in the video by following the same procedure.
The original starting files are here.
Save the file as a PSD file with layers. - Assignment 10:
After you are done with your images from the 2 videos above, turn in your finished .PSD file from 1 of the videos. You only need to turn in one of the 2 finished files from the videos. You do not need to resize images before turning them in. Drop 1 PSD file with layers into the Assignment 10 drop box in Canvas. You can turn in either one this time. Freedom! - Here are some links to Artists/Photographers who worked in Montage/Compositing/Photoshoping(like Assignment 12). I would recommend taking a look at the ones in bold.
- Optional:Post an image to the discussion called Weekly Image Share. Post whatever you want that you took during the week, and we can all see and comment. This is not for Assignment images, and it is not required, but it may count to participation points, and it would be great to see thnigs that you all are interested in photographing.
- Take a look at Ch. 8 in the Kelby Book on HDR. This goes over processing HDR images in Photosop/Camera Raw
- If you would like to check out how to do HDR in Lightroom look at Ch. 7 in The Adobe Photoshop Lightroom Classic CC Book for Digital Photographers, which you should have access to at oreily.com with the same access you use for the Photoshop book. Here is a direct link to Ch. 7.
- Watch the video on Shooting and Processing HDR Images. It will help with Assignment 11.
-
Assignment 11 - Main Assignment - HDR:
Shoot bracketed images of 2 high contrast scenes and create HDR images from them using Photomatix and/or Photoshop, or even a newer app, Aurora HDR(not in the video and mac only). Photomatix and Aurora HDR offer student discounts.
Download HDR assignment examples here.
Check the calendar for due dates.- HDR Instructions for Photoshop
- See HDR Tips
- Stuck in Customs HDR Photography Tutorial
- Link to Photomatix software(Mac and Windows)
- Link to Aurora software(mac only).
- To Turn in:
- Turn in your 2 final images and your original bracketed shots that you used when making the final images.
- Put your final images into a separate folder.
- Resize all images to a maximum dimension of 1200 pixels wide or 1200 pixels high.
- Save them as jpegs with a quality setting of 7 for the image processor in Photoshop, or 70 in Lightroom.
- Make sure your images are named like this:
firstname_lastname_assign11_datecreated_imagenumber.jpg- Watch the video on image processing to rename files quickly
- Use your own name and date of course.
- Put your images in a folder named firstname_lastname_assign11(use your name), zip the folder and drop them into the Canvas drop box for the assignment.
- Watch the video on Retouching tools. It can help with Assignment 12. Follow along with the video using the file located here.
- Optional this week. Watch the video on Blending Modes and Blend if Sliders in Photoshop. It can help with Assignments 12 and 13. Follow along with the video using the files located here. You do not have to turn anything in for this video.
-
THIS ASSIGNMENT IS EXTRA CREDIT
Start Assignment 12 - Main Assignment - Compositing:
Make 2 different composite images(not faces) on the subjects of your choice, with at least 1 being as believable as possible. Use at least 2 original(shot by you) images in each composite. Try to match lighting, color, f-stop, focal length, etc when shooting your original files to make the final images blend more realistically. Turn in as as a layered photoshop file(PSD) with a maximum dimension of 1200 pixels wide or 1200 pixels high. You can go to the image menu in photoshop and select image size to resize. Change the pixel dimensions at the top of the dialog box. Make sure resample image and constrain proportions are checked at the bottom of the dialog box. If you have a lot of layers and your final file size is above about 4 or 5 MB, you may need to reduce the dimensions of your file further. You could try 1000 pixels instead of 1200. Do not try to turn in the assignment with smart objects in it as it will probably be too big. You probably will have to use regular layers. Download compositing assignment examples here.
Make sure to check the calendar for the due date.- Requirements:
- Make sure you turn in 2 completely different final images that were made by combining 2 or more images for each final image.
- Make sure to shoot new photos for each final image if possible. Do not use old photos or found images if possible.
- You can composit things in your house or that you have safe access to.
- Post your 2 final images to your flickr account and add them to the group page:
- https://www.flickr.com/groups/gds73_online_summer2020/
- Tag the images with "composite"
- Look at other students composites in Flickr and comment on at least 2 images from other students
July 6 and July 13 - Weeks 5 and 6 - Instructions:
- We are in the home stretch! I have really enjoyed the work from this class this Summer, so keep it up. The final 2 weeks are posted so you can plan accordingly. Have fun!
- Good Portraits Discussion:
- Post an image from one of the 2 collections below in the Canvas discussion forum called "Good Portraits" by Friday.
100 greatest portraits
100 Portraits — 100 Photographers: Selections from the FlakPhoto.com Archive (there is a gallery if you scroll down the page a little) - Here is how to upload files for Canvas so you can post them in a discussion
- Here you can see how to add images to a post from your files after uploading
- Write a couple of sentences about why you think the image is effective or well done.
- The discussion forum is called "Good Portraits".
- Also, comment on at least one other person's post by Monday.
- Post an image from one of the 2 collections below in the Canvas discussion forum called "Good Portraits" by Friday.
- Watch the short video Making of Migrant Mother , about one of the most famous images ever made in America by Dorothea Lange
- Watch this short Video on Julia Fullerton Batten
- Check out this page on Sports and Action Photography. It is the page referenced in the video below and has tips and links about shooting sports. We are not doing any sports photography this term because of the virus, but you can use the information later and there may be some related questions on the final exam.
- Watch the video GDS 73 Sports and Action Photography 1 - Basic Tips and Canon Settings
- Watch the video GDS 73 Sports and Action Photography 2 - Nikon Settings and Basic Processing
- Important. Make sure to watch the video on GDS 73 Abstract Images and Self Portraits with Blending Modes before you do Assignment 13.
- Here are 2 of the images from the video(resized) if you would like to see how they were constucted. Beware of the large files.
-
Assignment 13: Create an image combining at least 3 images you took, using using blending modes and masking. This is not a realistic scene or composite image like Assignment 12, this can be very abstract.
Make sure you have watched the video on Blending Modes and Blend if Sliders in Photoshop
Make sure to watch the video on GDS 73 Abstract Images and Self Portraits with Blending Modes before you do the assignment. This one will take you through the process of creating an image for Assignment 13.
You have 2 options for this Assignment.
Option 1: Shoot images of objects and textures at your home to combine into an abstract/nonrepresentational image.
- Use blending modes and masks(optional) to combine the images.
- This is not an image of a specific thing, but a collection of shapes, textures, colors, etc.
- Watch the video on blending modes from Week 12 and the Abstract Images and Self Portraits using Blending Modes video for help.
- Shoot new images for this option.
- Example:
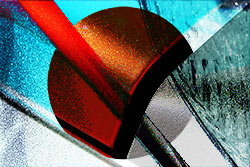
- Download an example file
Option 2: Create a self portrait by photographing objects and textures at your home to combine with an image of yourself.
- Use blending modes and masks(optional) to combine the images.
- This option can include images of objects, shapes, textures or any other photographic image that might help describe you.
- Watch the video on blending modes from Week 12 and the Abstract Images and Self Portraits using Blending Modes video for help.
- Shoot new images for this option.
- Example:
- Download an example file
To turn in either option:
- After you are done combining the images in photoshop, save your file as a PSD file.
- Then, reduce the image size to 1000 pixels on its longest side. You can do this by going to the image menu in photoshop and choosing image size, and then changing the pixel dimensions at the top. Make sure resample image and constrain proportions are checked at the bottom of the dialog box.
- Save this as a new PSD file with layers(so you don't lose your original).
- Drop the smaller psd file into the assignment drop box in Canvas. It should be small enough to upload to Canvas.
-
Start Assignment 17 - The Final Project:
Do a series of photos on the subject of your choice with 10 quality images.- Each image should able to stand on its own, as well as work as a group with the other images.
- Download assignment examples here.
- Check the calendar for due dates.
Examples
- Tell a story with images
- Document someones life or an event
- Create a series of landscapes with a common theme or style
- To Turn in:
- Resize your 10 images to a maximum dimension of 1500 pixels wide or 1500 pixels high(watch the video on image processing.)
- Make sure your name is on each image.
- Save them as jpegs with a quality setting of 8.
- Put only your 10 images in a folder, zip the folder and drop them into the drop box for the assignment, which will be posted next week in the weekly module.
- Post your 10 Final Project images to the flickr group and tag with gdes73finalproject
- Optional: Watch the video on Color Correction in Photoshop. It covers some of the material from the Bonus Chapter on the Kelby book website at http://kelbyone.com/books/cc17/.
Follow along with the video using the files located here.
You do not have to turn these files in, but you should know the material. - Check out the page on Landscape and Cityscape Photography Tips Page and watch the video on Landscape/Cityscape Photography Tips
You do not have to do any landscape or cityscape photos this semester, but there may be some related questions on the final exam.
- Important! Watch this video on shooting with studio strobes and classic lighting styles
Portrait Lighting for Photography and Video! - Here are some notes on Lighting
- Take a look at Chapter 4 of the the Kelby Book. It covers correcting for lens problems.
- Watch the video on Lens Corrections in Camera Raw.
Follow along with the video using the files located here.
You do not have to turn these files in, but you may use the techniques on Assignment 14. - Watch the video on Converting Images to Black and White in Camera Raw and Lightroom.
Follow along with the video using the files located here.
You do not have to turn these files in, but you will use the techniques on Assignment 14. - Converting to Black and White for Assignment 14 below: Look through the exercises in Chapter 5 in the Photoshop Kelby Book covering converting to black and white(pages 126-132 of the printed version). It covers converting images to black and white and toning.
Chapter 7 of The Adobe Photoshop Lightroom Classic CC Book for Digital Photographers has information on converting to black and white using Lightroom. You should have free access to the book through you oreilly.com account.
Important Note:
The Convert to Grayscale button has been removed from the HSL panel in Camera Raw, so some of the workflow is not applicable from the Kelby Book section on converting to black and white if you are using the newest version of Photoshop/Adobe Camera Raw. A new method using Profiles to convert to BW was added in version 10.3 of Adobe Camera Raw. You can see details on the blog here, and BW conversion profiles are described in this video. Black and white is discussed at about 5:30 into the video.
The start files can be found on the book website(http://kelbyone.com/books/cc17/). I will not collect the finished files, but you do need to know the material for the next assignment. - Watch War Photographer - James Nachtwey
-
Assignment 14: Use lens correction techniques on one of your own color images, and then use the corrected image to create a black and white version of your image.
After going through pages 126-132 in Chapter 5 in the Kelby book, Chapter 4 on lens corrections, and watching the video on lens corrections and the video on converting to black and white, use the techniques on a color image of your own and then convert it to black and white or tone it. Do the lens corrections before converting to black and white or toning the image. You can do this in either Camera Raw or Lightroom. Save the before and after versions as JPEGs with a maximum dimension of 1200 pixels wide or 1200 pixels high with a quality of 7, and drop the 2 files into the assignment drop box in Canvas. To save a single image as a jpeg, you can go under the file menu in photoshop and look for save as, and change the file type to jpeg. Drop your before and after images into the drop box in Canvas. -
Finish Assignment 17 - The Final Project:
See the description above.
- Check out some camera apps with manual controls
- Take a look at Chapters 9 and 10 of the the Kelby Book. They cover correcting for common problems and special effects.
- Watch the video Retouching in Photoshop
(the files used in the video are here) - Watch the video Shooting and Processing Panoramas
- Assignment 15 - Extra Credit: You have 2 options for this assignment
- Shoot 2 new, close-up portraits, and retouch them using the techniques in this weeks video or previous videos. Do not use the files from the video. You can also read Chapters 9 and 10 of the the Kelby Book for tips on retouching portraits. They have tips related to retouching portraits.
To turn in, resize your images to a maximum dimension of 1000 pixels wide or 1000 pixels high and save as jpegs with a quality of 8. Turn in the 2 before images and 2 after images into the drop box in Canvas. - Watch the video on Retouching for help with the retouching assignment above (the files used in the video are here)
- After watching the video on panoramas and looking at the resources below, create your own panorama by using the procedure in the video. After you are done creating the image, resize to 2000 pixels wide and save the file as a JPEG with a quality setting of 7. After you are done converting, drop it into the assignment drop box in Canvas. Download Pano Tips here.
- Watch the video Shooting and Processing Panoramas
- Here is a video on using Boundary Warp to fill the edges of the panorama in Lightroom Classic.
- Read the section in the Kelby book on "Stitching Panoramas Right in Camera Raw" on pages 112-115 of the printed book.
- For either option, post your single best image to the flickr group at
https://www.flickr.com/groups/gds73_online_summer2020/
- Shoot 2 new, close-up portraits, and retouch them using the techniques in this weeks video or previous videos. Do not use the files from the video. You can also read Chapters 9 and 10 of the the Kelby Book for tips on retouching portraits. They have tips related to retouching portraits.
- Assignment 16: Critique 1 image from the Final Project of another student. After the due date for the Final Project, evaluate one image from another student in the class using the file gdes73online_photo_critique_assignment1.doc (Download here). Here is the link to the projects. Critique the persons submission who is in the folder below yours. If you are at the bottom of the list, do the person's at the top. Fill out the form following the instructions on it, and drop it into the drop box in Canvas. I will also post the critique files after the due date, so you can see the critique of your image.
- Check out the final exam info below.
- Take the class exit survey in the weekly module for more extra credit.
- Any late assignments must be turned in by July 17.
- Take a look at our Degrees and Certificates on the GDS Website. We have classes on Dreamweaver, 3D, Photoshop, video, motion graphics and more.
- Follow us on Instagram at:
https://www.instagram.com/designatmission/ I may post some of your images there! - Make sure to like our facebook page at:
http://www.facebook.com/missioncollegedesign. - We are on Twitter too. https://twitter.com/designatmission
- Make sure to review this page on terms here before the final exam:
gdes_073_terms.htm - Take the Final Exam (see below).
- Thanks for taking the class, and I hope you enjoyed it.
-
The Final Exam
- The Final Exam will be taken in CanvasThursday, July 16 at 6AM and Friday, July 17 at 6AM(open 24 hours). You can take it at any time in that time window. Let me know if you cannot take it in that period.
- The test is open book and open internet, but it is timed(2 hours from when you start)!
- Do NOT colloborate on the exam or get help from another person.
- There are about 60 questions.
- The questions are multiple choice, multiple answer and true false.
- The questions will cover information found in the videos, exercises and files used throughout the course.
- Also make sure to review this page on terms here:
gdes_073_terms.htm - Login to Canvas and look under the Modules link for the exam and instructions.
- You have 2 hours to complete the exam.
- Click the submit button only when you are finished.